Mastering Microwave Corn on the Cob: Juicy Perfection in Minutes
Imagine biting into a perfectly cooked ear of corn – sweet, tender, and bursting with juicy flavor. Now imagine achieving that ideal texture not after waiting for a pot to boil or a grill to heat up, but in just a few short minutes, right in your kitchen. This culinary dream is entirely possible with your microwave! Learning how to prepare
microwave corn on the cob is a game-changer for quick, delicious side dishes, offering unparalleled convenience without compromising on taste. Whether you prefer to cook it with its natural husk still on or opt for the pre-shucked approach with a clever paper towel trick, we'll guide you to consistently juicy results every single time.
Why Microwave Corn on the Cob is Your New Best Friend
In the world of home cooking, time is often a luxury. Traditional methods for preparing corn on the cob, while delicious, can be time-consuming. Boiling requires waiting for a large pot of water to come to a rolling boil, and grilling demands preheating and constant attention. This is where the microwave truly shines.
*
Unbeatable Speed: Forget the long wait times. A single ear of corn can be perfectly cooked in as little as 2-5 minutes, depending on its size and your microwave's wattage. This speed makes it an ideal choice for a busy weeknight or a spontaneous craving.
*
Effortless Preparation: With minimal equipment – essentially just an ear of corn and your microwave – preparation and cleanup are a breeze. There's no heavy pot to scrub or grill grates to clean.
*
Perfect for Small Batches: If you're only cooking for one or two people, or just want a single ear as a snack, microwaving is incredibly efficient. It feels unnecessary to boil a whole pot of water for just a couple of cobs! When you're looking to
microwave corn on the cob faster than boiling, with easy prep, this method is your go-to.
*
Retained Moisture and Flavor: The microwave creates a steaming environment that locks in the corn's natural sugars and moisture, resulting in exceptionally sweet and juicy kernels.
While boiling or grilling certainly have their place, especially for large gatherings, the microwave offers a distinct advantage for everyday convenience, ensuring you never have to sacrifice flavor for speed.
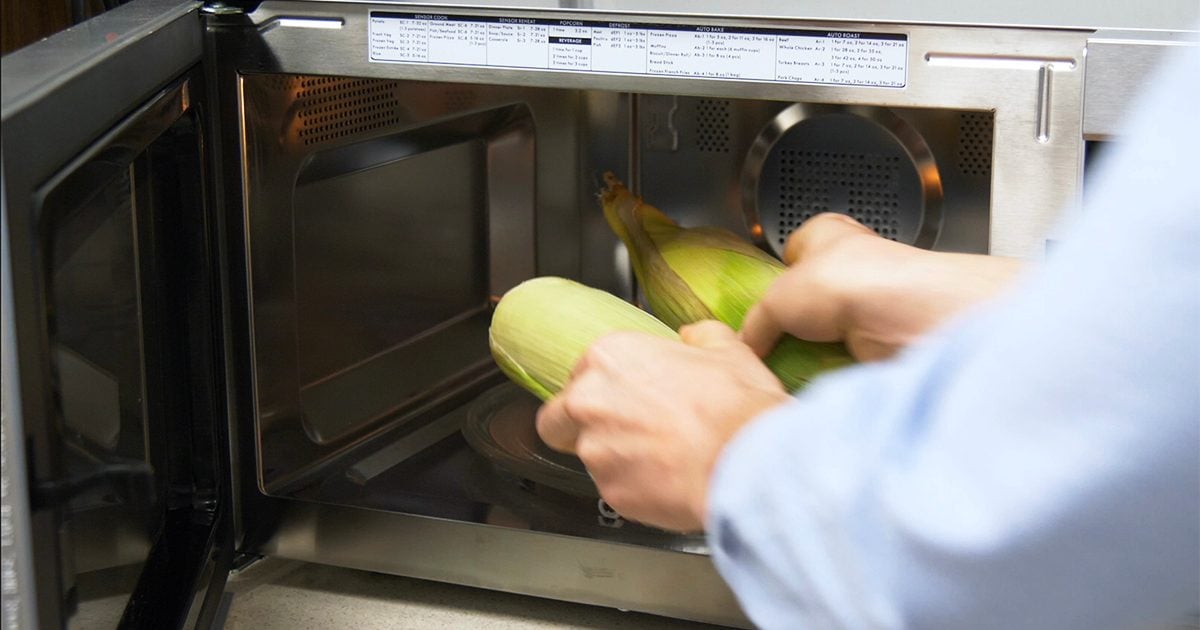
The "Husk On" Method: Nature's Perfect Steamer
Cooking corn on the cob with the husk still intact is arguably the easiest and most effective way to achieve succulent, perfectly steamed kernels in the microwave. The husk acts as a natural, self-contained steamer bag, trapping moisture and allowing the corn to cook evenly and thoroughly.
Why Keep the Husk On?
Leaving the husk on harnesses the corn's natural protective layer. As the microwave heats the moisture within the corn and its husk, it creates steam. This steam gently cooks the kernels, ensuring they remain plump, tender, and incredibly juicy. Another fantastic benefit? Once cooked, the husk and silk come off remarkably easily, often sliding right off after a quick trim of the stem end.
Step-by-Step Guide for Husk-On Corn
1.
Select Your Corn: Choose fresh ears of corn with bright green husks and moist silks.
2.
Prepare for Microwaving: Place one ear of corn directly into your microwave. For multiple ears (up to 4 at a time, depending on your microwave's size), arrange them in a spoke pattern, ensuring they don't touch if possible, to promote even cooking. No need for plates or covers at this stage.
3.
Microwave on High: Cook on high power for 3-4 minutes for a single medium-sized ear. If cooking more than one, add 2-3 minutes per additional ear (e.g., 2 ears = 5-7 minutes, 3 ears = 7-9 minutes). Cooking times will vary based on corn size and microwave wattage, so it's always best to start with less time and add more if needed.
4.
Rest and Cool: Once the cooking time is up, carefully remove the hot corn from the microwave. The husks will be *very hot* and full of steam. Place the ears on a cutting board or plate and let them cool for at least 5 minutes. This resting period allows the internal cooking to complete and makes the corn safe to handle.
5.
Easy Shucking: Once cooled enough to handle (use oven mitts if still very hot), grasp the uncut end of the corn. With a sharp knife, carefully cut off the stem end of the corn, about 1 inch from the base. Now, holding the tip (where the silk emerged), simply squeeze or pull the husk downwards. The entire husk, along with all the silk, should slide right off, revealing a perfectly clean, cooked ear of corn.
The "Husk Off" Method: Damp Paper Towel Magic
Sometimes, you might purchase pre-shucked corn, or perhaps you prefer to remove the husks and silks at the store or immediately upon returning home. Don't worry, you can still achieve perfectly moist
microwave corn on the cob without the husk. The secret lies in mimicking the husk's moisture-trapping ability with a simple kitchen staple: a damp paper towel.
When to Choose Husk Off?
This method is ideal if:
* You're using corn that has already been shucked.
* You prefer to clean the corn thoroughly before cooking.
* You want to season the corn *before* cooking for deeper flavor infusion.
Step-by-Step Guide for Shucked Corn
1.
Prep the Corn: Ensure your corn is completely shucked and free of silk.
2.
Dampen a Paper Towel: Take a standard paper towel, wet it thoroughly under the tap, and then wring out as much excess water as possible. It should be damp, not dripping wet. This dampness is crucial for generating the necessary steam.
3.
Wrap the Corn: Tightly wrap each shucked ear of corn in its own damp paper towel. Make sure the entire ear is covered to trap steam effectively.
4.
Microwave on High: Place the wrapped corn (1-4 ears) in the microwave. For a single ear, cook on high for 2-3 minutes. For multiple ears, add 1-2 minutes per additional ear (e.g., 2 ears = 3-5 minutes, 3 ears = 4-6 minutes). Again, adjust times based on corn size and microwave wattage.
5.
Check for Doneness: Carefully unwrap one end of the paper towel. The kernels should look plump, vibrant yellow, and feel tender when pierced with a fork. If not, re-wrap and microwave in 30-second increments until cooked to your liking.
6.
Serve Immediately: Once cooked, carefully unwrap the corn (it will be hot!) and serve.
Achieving Perfectly Juicy Microwave Corn Every Time
While the methods are straightforward, a few key insights can elevate your
microwave corn on the cob from good to absolutely glorious.
Understanding Cook Times and Microwave Wattage
Microwaves vary significantly in power. A higher wattage microwave (typically 1000-1200 watts) will cook faster than a lower wattage one (700-900 watts).
*
Start Conservative: Always begin with the lower end of the recommended cooking time (e.g., 2 minutes for a shucked ear, 3 minutes for a husk-on).
*
Test and Adjust: It’s easier to add more cooking time than to salvage overcooked, dry corn. If it’s not quite done, add 30-60 second increments until it reaches your desired tenderness.
*
Size Matters: Smaller, thinner ears of corn will cook faster than thick, robust ones.
Dealing with Fresh vs. Frozen Corn
The primary reference for this article focuses on fresh corn, which yields the best results due to its higher natural moisture content and sugar levels. However, you *can* microwave frozen corn on the cob.
*
Frozen Husk-On: If you've frozen corn with the husk on (a fantastic way to enjoy summer corn all year!), you'll need to add about 2-3 minutes to the cooking time per ear compared to fresh.
*
Frozen Shucked: For frozen, pre-shucked corn, wrap it in a damp paper towel just like fresh shucked corn, but add 1-2 minutes to the cooking time. It's often beneficial to let frozen corn sit at room temperature for 5-10 minutes before microwaving to help it thaw slightly and ensure more even cooking.
Batch Cooking & Scaling Up
For those times you need to
cook perfect corn on the cob in minutes with your microwave, especially for a few servings, this is your secret weapon. While extremely efficient for a few ears, the microwave does have limitations for larger quantities.
*
Limit to 4 Ears: It's generally recommended not to microwave more than 4 ears of corn at a time. Overcrowding can lead to uneven cooking, with some ears overdone and others still raw.
*
Rotate for Evenness: If cooking multiple ears, consider pausing halfway through the cooking time to rotate their positions in the microwave.
*
Consider Alternatives for Crowds: For large family meals or gatherings exceeding 4-6 people, traditional boiling or grilling might be more efficient for batch cooking, as you can cook many ears simultaneously in a large pot or on a spacious grill.
Beyond Butter: Flavor Enhancements
Once your
microwave corn on the cob is perfectly cooked, the possibilities for seasoning are endless:
*
Classic Simplicity: A pat of butter (or a drizzle of olive oil), a sprinkle of sea salt, and freshly ground black pepper are always a winner.
*
Herbal Infusion: Add chopped fresh cilantro, parsley, chives, or basil.
*
Spicy Kick: A dusting of chili powder, smoked paprika, or a squeeze of lime juice with a dash of cayenne pepper.
*
Cheesy Goodness: Grated Parmesan, cotija cheese, or feta crumbles offer a savory twist.
*
Mexican Street Corn Style (Elote-inspired): A smear of mayonnaise, a sprinkle of cotija cheese, chili powder, and a squeeze of lime juice transforms your corn into a vibrant flavor experience.
Troubleshooting Common Microwave Corn Issues
Even with the best instructions, sometimes things don't go exactly as planned. Here's how to tackle common issues:
Dry Corn?
If your kernels come out a bit dry or rubbery, it's usually a sign of overcooking. Microwaves cook quickly, and even 30 extra seconds can make a difference. Next time, reduce your cooking time slightly and check for doneness earlier. For shucked corn, ensure your paper towel is sufficiently damp to create ample steam.
Under-cooked Kernels?
If some kernels are still a bit firm or raw, simply return the ear (or ears) to the microwave and cook in 30-second increments until tender. If cooking multiple ears, try rotating them in the microwave to ensure more even heat distribution.
Safety First: Handling Hot Corn
Always exercise caution when removing corn from the microwave.
*
Husk-on corn: The husks will contain superheated steam. Use oven mitts or tongs to remove them, and allow them to cool for several minutes before attempting to shuck to avoid steam burns.
*
Shucked corn: The paper towel and corn itself will be very hot. Use tongs or oven mitts, and unwrap carefully to release steam away from your face and hands.
Conclusion
Preparing
microwave corn on the cob is a truly brilliant culinary hack that brings juicy, flavorful corn to your plate with unparalleled speed and ease. Whether you embrace the natural steaming power of the husk or leverage the damp paper towel trick for shucked ears, you're guaranteed a delicious outcome. This method is perfect for individuals, small families, or anyone seeking a quick, healthy side dish without the fuss. So, next time you're craving that sweet taste of summer, remember your microwave is ready to deliver perfectly cooked, incredibly juicy corn on the cob in mere minutes. Give it a try – your taste buds will thank you!